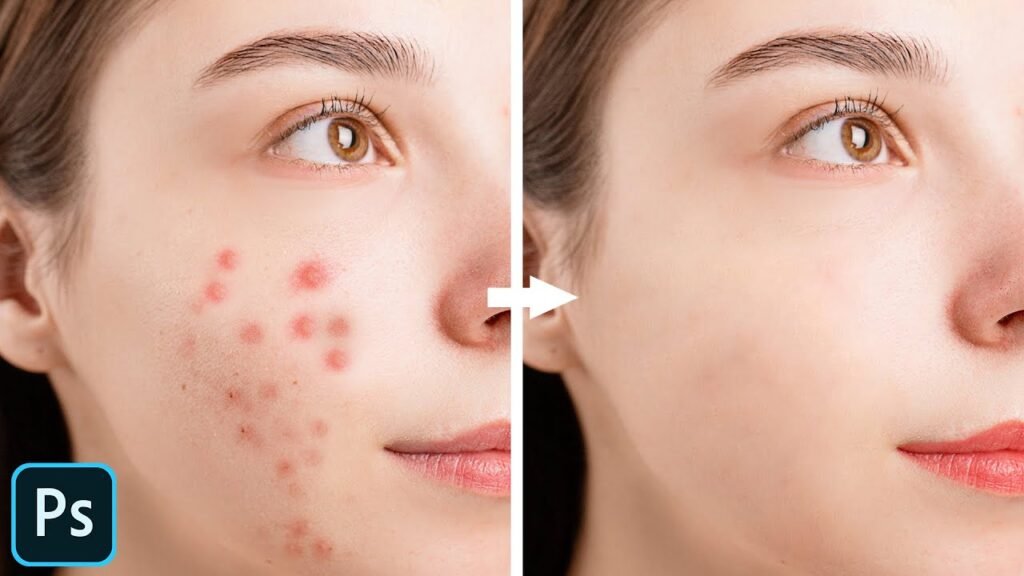
Looking for a quick way to get clear, flawless skin in your photos? Whether it’s pimples, acne, or small blemishes, Adobe Photoshop makes it easy to retouch your portraits and achieve professional-looking results. In this tutorial, we’ll show you how to remove pimples and acne in Photoshop step by step.
Why Use Photoshop for Skin Retouching?
- Precise control over edits
- Natural-looking results
- Professional-quality skin smoothing
- Perfect for portraits, selfies, and model photography
Step-by-Step Guide to Remove Pimples & Acne in Photoshop
1. Open Your Image in Photoshop
- Go to File > Open and select your photo.
2. Duplicate the Background Layer
- Press
Ctrl + J(Windows) orCmd + J(Mac). - This keeps your original photo safe while you edit.
3. Use the Spot Healing Brush Tool
- Select the Spot Healing Brush Tool (J) from the toolbar.
- Adjust the brush size slightly larger than the blemish.
- Click on pimples or acne spots — Photoshop automatically blends them with surrounding skin.
4. Try the Healing Brush or Clone Stamp Tool
- For stubborn acne or scars, use the Healing Brush Tool.
- Alt-click (Windows) or Option-click (Mac) to sample clean skin, then paint over the blemish.
5. Use Frequency Separation (Advanced)
- Separate skin texture and color onto different layers.
- Smooth uneven tones without losing natural skin texture.
6. Final Touches
- Adjust Brightness, Contrast, or Curves for polished results.
- Zoom out to check the overall look and ensure it looks natural.
Tips for Natural Skin Retouching
- Don’t overdo it — keep the skin texture visible.
- Use a soft brush with low hardness for smoother blending.
- Always edit on a duplicate layer for non-destructive editing.
Final Thoughts
With Photoshop, removing pimples and acne is quick and effective. By mastering tools like the Spot Healing Brush, Healing Brush, and Frequency Separation, you can achieve flawless portraits while keeping skin realistic and natural.